Executive Summary
In liquid platemaking, exposure unit performance directly determines plate consistency, detail reproduction, and long-term reliability of photopolymer printing plates. A neglected exposure unit glass or underperforming lamps will undermine even the best AVantage® resin systems, leading to defects, remakes, and pressroom variability. An optimized exposure unit maintenance program anchors plate quality and protects capital equipment investments.
This article presents an in-depth, practical framework for exposure unit maintenance in AVantage® liquid platemaking environments. It explains why matte glass surfaces and vacuum integrity are critical, how to clean and restore exposure unit glass, how to monitor and manage lamp intensity, and how to control post-exposure conditions such as salt bath concentration and exposure time. The emphasis is on actionable procedures, proper safety practices, and quantitative thresholds for lamp replacement and process adjustments.
By adopting the exposure unit maintenance strategies outlined here, flexographic printers can stabilize plate quality, reduce troubleshooting time, and extend equipment life. The result is more predictable platemaking, better press performance, and higher confidence in every plate that leaves the plate room.
The primary keyword used throughout this whitepaper is exposure unit maintenance, along with variations such as exposure unit glass maintenance and exposure unit lamp maintenance.
Introduction: The Critical Role of Exposure Unit Maintenance
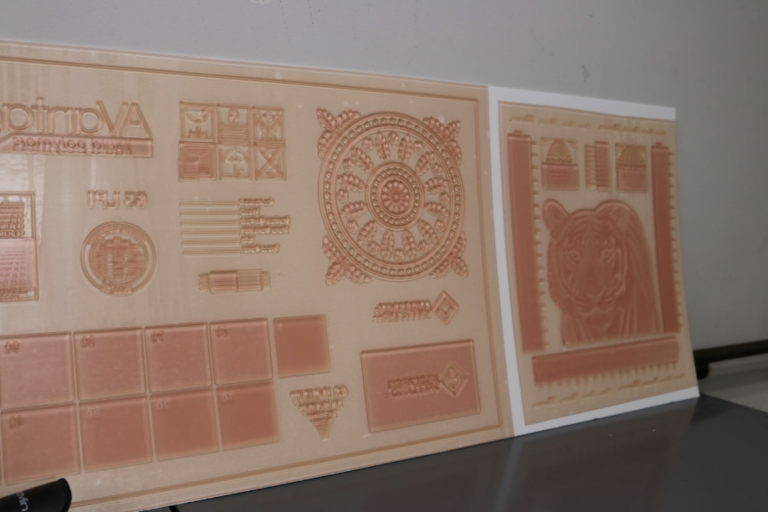
Liquid platemaking for AVantage® photopolymer printing plates depends on precisely controlled UV exposure through clean, matte glass surfaces. If the exposure unit is not maintained, glass contamination and declining lamp output will gradually erode plate quality, often in subtle ways that only become obvious on press.
Effective exposure unit maintenance ensures:
- Reliable vacuum seals for intimate contact between the cover film, negative, and plate.
- Consistent UV energy delivery to all image areas, preserving fine detail and relief.
- Predictable post-exposure and detack performance that produces stable, tack-free plates.
Treating the exposure unit as a critical process asset, rather than just a piece of equipment, is essential for modern flexographic operations using AVantage® liquid systems.
Understanding Exposure Unit Glass and Matte Finish
The glass surfaces in an exposure unit are not simple transparent windows. They are engineered with a matte finish that plays a specific functional role in liquid platemaking. In most AVantage® systems, there are:
- Lower frame glass surfaces that support the plate and cover film stack.
- Upper frame glass surfaces that work with the substrate, vacuum blankets, and seals.
The matte finish on these glass surfaces allows air to evacuate efficiently during vacuum drawdown. It creates micro pathways that let trapped air escape so the cover film and substrate can lie flat and tight against the plate and negative.
When contaminants fill in the microstructure of the matte finish, the glass becomes glossy or clear in appearance. This interferes with vacuum evacuation and leads to imperfect contact, causing defects such as:
- Localized “dime-sized” low spots where the plate was not fully in contact with the negative.
- Zebra-like patterns or streaks are caused by uneven contact and air entrapment.
Maintaining the matte finish through proper exposure unit glass maintenance is therefore fundamental to consistent plate making.
Sources of Contamination on Exposure Unit Glass
Over time, exposure unit glass accumulates a mix of contaminants from routine work in the plate room, including:
- Dust and airborne particles from the surrounding environment.
- Residual film or polymer from cleaning agents that are not fully removed.
- Tack rag residues, fingerprints, and handling soils.
- Atomized or smeared resin from plate processing operations.
These contaminants tend to fill the microscopic texture of the matte finish, gradually polishing the glass and reducing its ability to vent air during vacuum drawdown. Contamination is often most noticeable in areas used most heavily, but even lightly used zones can degrade over time.
A proactive exposure unit maintenance program recognizes these contamination pathways and addresses them with scheduled cleaning rather than waiting for visible defects to appear on plates.
Safety Considerations Before Cleaning the Exposure Unit Glass
Exposure unit glass cleaning involves chemicals, physical effort, and proximity to electrical equipment. Safety must always precede the cleaning process.
Key safety practices for exposure unit glass maintenance include:
- Ensure the unit is powered down at the main disconnect or power source before cleaning.
- Wearing appropriate personal protective equipment, such as protective gloves and safety glasses, when handling cleaners, soft scrub solutions, or alcohol.
- Protecting internal components, especially vacuum lines and electronic assemblies, from liquid intrusion by masking or covering vulnerable areas.
- Review the safety information for all cleaning materials and follow those recommendations.
By integrating these steps into standard operating procedures, plants can perform exposure unit maintenance without introducing new risks to personnel or equipment.
Materials and Tools for Exposure Unit Glass Maintenance
Effective exposure unit glass cleaning requires the right materials, chosen to clean thoroughly without scratching or further polishing the matte surface.
Typical materials include:
- Lint-free towels for wiping and drying.
- A soft scrub solution or powder suitable for glass and matte finishes.
- A sponge with a Scotch Brite-type scrubbing surface on one side.
- Two buckets of clean, warm water, one for rinse water, one for solution makeup.
- A suitable glass cleaner, such as a non-ammonia, streak-free type.
- Isopropyl alcohol or a similar solvent for a final wipe down.
Gloves and safety glasses complete the kit. Using abrasive products not approved for matte glass can damage or excessively polish the surface, so only recommended soft scrub and scrub pad combinations should be used.
Step-by-Step Procedure for Cleaning Upper Frame Glass
The upper frame glass is often the primary surface interacting with the substrate and cover elements. A structured procedure for exposure unit glass maintenance on the upper glass follows:
- Open and secure the upper frame
- Open the upper frame fully and secure it per the manufacturer’s instructions so it cannot close unexpectedly.
- Power off the unit
- Turn the exposure unit off at the main power source or breaker to eliminate electrical hazards during cleaning.
- Protect the surrounding areas
- Cover lower frame components and adjacent surfaces to prevent drips and splashes from reaching areas where liquids could cause damage.
- Initial cleaning with glass cleaner
- Wearing gloves and safety glasses, spray the upper glass with glass cleaner.
- Wipe lightly with a lint-free towel to remove surface dust and loose contaminants, preparing the glass for more thorough cleaning.
- Soft scrub application
- Wet the sponge in warm water and apply the soft scrub solution to the Scotch Brite side.
- Using small circular motions, clean the entire glass surface, taking care to maintain even pressure and avoid dry scrubbing.
- Rinse the sponge frequently in a separate bucket of warm water to avoid redistributing polymer or contaminants onto cleaned areas.
- Rinse and wipe down
- Wipe the glass with a damp, lint-free towel to remove residual soft scrub.
- Apply glass cleaner again and wipe until the surface appears clean and uniform.
- Final alcohol wipe
- Using alcohol soaked lint-free towels, perform a final wipe down of the glass surface to remove any remaining residues.
- Inspect the finish
- Allow the glass to dry completely. A properly restored surface should exhibit a uniform matte look, not glossy patches.
- If areas still appear polished or clear, repeat the cleaning cycle in those zones.
This procedure, when repeated at appropriate intervals, maintains the matte character essential for vacuum performance.
Cleaning and Protecting Lower Frame Glass
The lower frame glass is equally important to plate quality, carrying the plate stack directly. Its cleaning steps mirror those of the upper glass, but with added attention to the vacuum system.
Key considerations for lower frame exposure unit glass maintenance:
- Before wet cleaning, cover all vacuum lines or ports with masking tape or other suitable barriers to prevent liquids from entering the vacuum system.
- Follow the same sequence of glass cleaner, soft scrub with a Scotch Brite sponge, thorough rinsing, glass cleaner wipe, and alcohol wipe.
- Remove masking only after the glass is fully dry and cleaning is complete.
If, after repeated cleaning, the glass still does not regain a matte appearance or vacuum issues persist, it may be necessary to involve a technical service representative. They can perform a more advanced procedure known as lapping, which is designed to clean and refresh the microtexture of the glass beyond normal maintenance.
Lapping and Technical Support for Severely Contaminated Glass
Lapping is a specialized process that uses a dedicated tool and compound to clean and restore the crevices of matte glass beyond the capability of routine soft scrub cleaning. It is typically needed when:
- The glass has been heavily contaminated over a long period.
- Standard cleaning fails to restore vacuum performance and matte appearance.
- Plates continue to exhibit vacuum-related defects despite careful maintenance.
Because lapping requires specific techniques and tools to avoid damage, it is best handled by trained technical personnel. Anderson & Vreeland technical service representatives can evaluate the condition of the glass, perform lapping where appropriate, and advise on future exposure unit maintenance schedules that minimize the need for repeat restorative work.
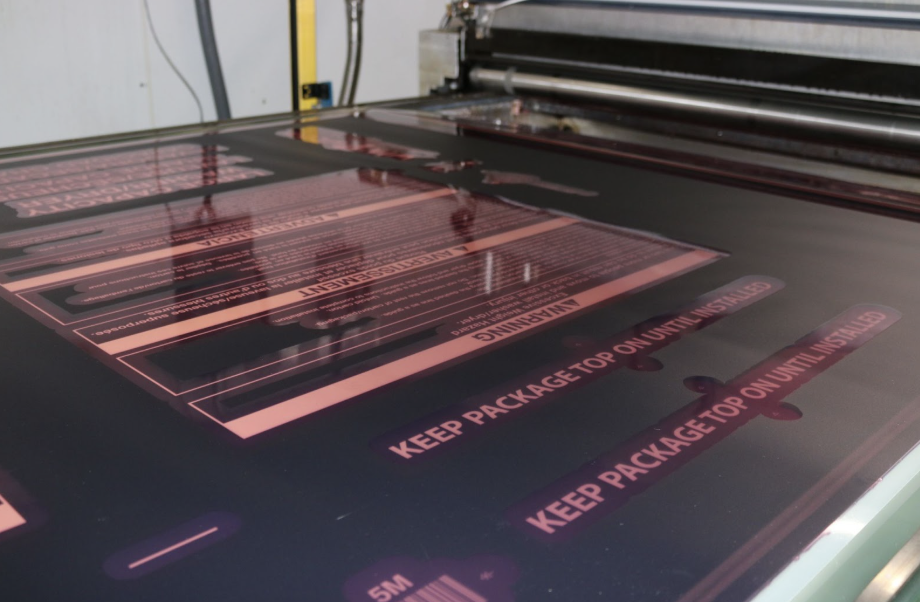
Lamp Output and Exposure Unit Lamp Maintenance
Clean glass alone cannot guarantee high-quality plates if the lamp output is inadequate. Lamp intensity is a critical variable in liquid platemaking, directly affecting relief depth, dot formation, and post-exposure performance. Over time, UV lamps lose intensity due to age, operating hours, thermal stress, and surface contamination.
A comprehensive exposure unit maintenance program must therefore include lamp selection, monitoring, and timely replacement.
Lamp intensity and plate quality
Low intensity lamps can result in:
- Underexposed plates with weak or unstable relief.
- Inconsistent dot formation, especially in fine screens and highlights.
- Poor detack performance and long post-exposure times.
Monitoring lamp intensity in milliwatts per square centimeter (mW/cm²) at specified wavelengths provides a quantifiable basis for maintenance decisions.
Lamp Requirements by Exposure Unit Type
Different models of exposure units used in AVantage® liquid platemaking have distinct lamp configurations and intensity targets. Typical patterns may include:
- For smaller units such as 3040 or 3048, high-output upper-frame UV lamps centered around 350 nanometers with intensity ranges on the order of a few mW/cm², and similar or slightly higher intensity in the lower frame.
- Special configurations using higher intensity 370-nanometer lamps, where increased curing energy is required.
- Larger units, such as 4460 and 5280, use defined intensity ranges for both upper and lower frames, with lower frames often operating at higher 370-nanometer intensities.
- Post exposure units (Post X) equipped with reflective high intensity lamps at around 370 nanometers and significantly higher output compared to imaging frames.
For each unit type, there are recommended replacement thresholds:
- Upper frame lamps should be replaced once intensity drops below a specified level, such as around 1.2 mW/cm² or comparable unit-specific values.
- Lower frame lamps should be replaced when their output falls below a defined threshold, for example, around 2.5 mW/cm² for standard imaging lamps.
- Post-exposure unit lamps should be replaced when output drops below a higher threshold, such as about 10 mW/cm², to preserve efficient detack performance.
These values provide a framework for exposure unit lamp maintenance and should be verified against the specific model and configuration in use.
Lamp Cleaning and Routine Maintenance
Lamp cleaning is an inexpensive yet powerful component of exposure unit maintenance. Dust and film on lamp surfaces reduce effective UV output, even if the lamps themselves are still within their usable life.
Recommended cleaning practices include:
- Cleaning lamps on a quarterly basis as a starting interval, with more frequent cleaning in dusty or high-volume environments.
- Use lint-free towels and an appropriate cleaner, such as Windex® or a similar glass-safe solution, to remove surface contamination.
- Handling lamps carefully to avoid breakage and preventing fingerprints on the glass, which can create hot spots and reduce UV transmission.
Along with lamp cleaning, operators should clean upper and lower frame glass on a regular schedule and visually inspect reflectors and interior surfaces for buildup that might affect UV distribution.
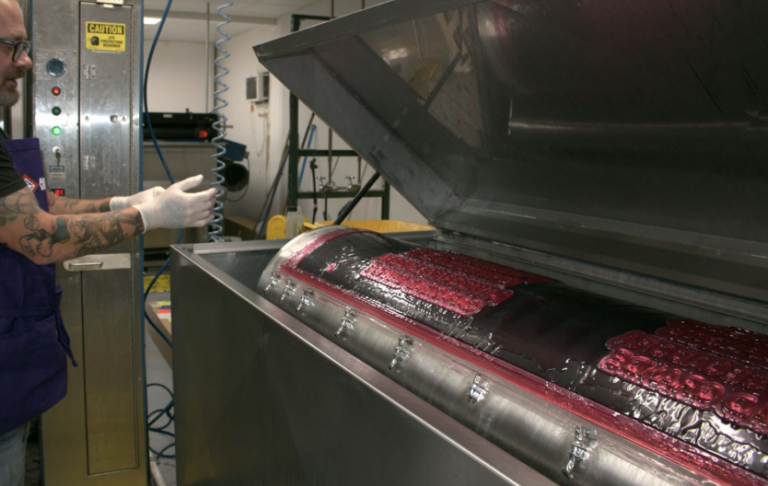
Post Exposure Systems and Detack Optimization
Post exposure is the final critical stage in liquid platemaking for AVantage® plates. It helps complete polymerization, improves dimensional stability, and, in salt bath systems, assists in detacking plate surfaces. Proper exposure unit maintenance extends to the post-exposure equipment as well.
Post-exposure performance is influenced by:
- Salt concentration in the Post X bath.
- Lamp intensity and exposure time.
- Bath cleanliness and water level.
Optimizing these parameters ensures that plates exit the process both fully cured and tack-free.
Post Exposure Lamp Intensity and Time Settings
Just as in imaging, post-exposure lamp intensity determines how long plates must remain in the unit to reach full cure. A simple strategy combines intensity measurement with a table of recommended exposure times.
For example, when the lamp output in the Post X unit is:
- At or above roughly 9.0 mW/cm², a post-exposure time on the order of 15 minutes may be suitable.
- Between about 8.0 and 9.0 mW/cm², extending exposure to around 20 minutes may be needed.
- Between approximately 7.0 and 8.0 mW/cm², post-exposure times may increase to around 25 minutes.
Below about 7.0 mW/cm², lamps are generally considered due for replacement, as exposure times become impractically long and detack performance may suffer.
This quantitative approach to exposure unit maintenance in post-exposure helps ensure consistent plate cure even as lamps age.
Post X Salt Bath Concentration and Mixing
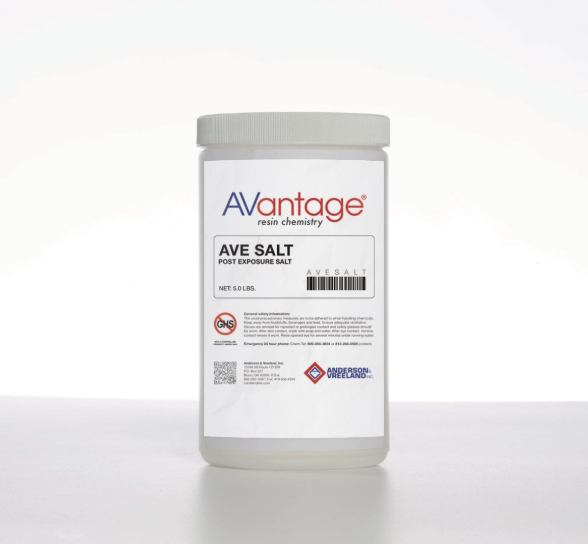
Post X systems often use AVE Salt or a similar salt product in the post-exposure bath. Maintaining correct concentration is essential for repeatable detack and plate stability.
Typical starting guidelines may include:
- For 3040 or 3048 units, add a defined weight of AVE Salt per day of operation to maintain the target concentration.
- For 4460 units, use a higher daily addition rate proportional to bath size.
- For 5280 units, using an even greater amount to reflect increased bath volume.
Rather than dumping salt directly into the bath, the best practice is to:
- Pre-dissolve AVE Salt in water in a separate container.
- Add the solution to the bath, ensuring even distribution and preventing undissolved clumps.
- Verify that the bath water level fully covers the plates during post-exposure.
Regular monitoring of the bath, including visual inspection and periodic solution replacement, creates a stable environment for post-exposure work.
Integrating Glass, Lamp, and Post-Exposure Maintenance into a Unified Program
To achieve truly reliable exposure unit performance, plants should integrate all elements into a single exposure unit maintenance program:
- Scheduled glass cleaning for upper and lower frames, with documentation of dates and observations.
- Routine lamp cleaning and periodic intensity measurements, coupled with defined replacement thresholds.
- Regular Post X bath maintenance, including salt additions, water level checks, and lamp intensity-based exposure time adjustments.
- Clear safety procedures for lockout, PPE, and chemical handling during maintenance.
Documentation of this program not only supports internal consistency but also demonstrates due diligence to customers and auditors. Over time, the program can be refined based on actual plate quality data and production experience.
Operational Benefits of Rigorous Exposure Unit Maintenance
A disciplined approach to exposure unit maintenance delivers tangible benefits across the production chain:
- Fewer plate defects caused by vacuum leaks, underexposure, or uneven UV distribution.
- Reduced need for remakes and adjustments at the press, supporting faster makeready and higher uptime.
- Extended glass and lamp life through preventive care rather than reactive replacement.
- Improved consistency across shifts and operators, as standardized procedures replace ad hoc methods.
These outcomes translate into better resource use, more stable scheduling, and stronger confidence among press operators and customers in the plates delivered by the platemaking department.
Partnering with Anderson & Vreeland for Exposure Unit Optimization
Anderson & Vreeland provides not only AVantage® liquid platemaking materials but also deep expertise in exposure unit maintenance and optimization. Technical service representatives can help evaluate current exposure unit conditions, recommend maintenance intervals, assist with glass lapping when required, and advise on lamp selection and replacement strategies.
By collaborating with Anderson & Vreeland, flexographic printers can:
- Benchmark their exposure unit maintenance practices against industry best practices.
- Resolve persistent plate quality issues related to vacuum, exposure, or post-exposure performance.
- Train staff on proper cleaning, safety, and measurement techniques.
Contact Anderson & Vreeland Today
For additional guidance on exposure unit glass maintenance, lamp management, and post-exposure optimization with AVantage® systems, contact Anderson & Vreeland. A well-maintained exposure unit is a cornerstone of high-quality, reliable liquid platemaking.
Anderson & Vreeland
Phone: (866) 282-7697
Your Partner in Flexographic Printing Excellence